
Phones, tablets, even phablets – mobile devices come in various shapes and sizes. So why not make better use of the screen real estate available to you?
This applies especially to list views – an overview of numerous records and some of their details, neatly ordered into a list. And that’s why in the Autumn Release we’ve introduced responsive list design to Resco Mobile CRM. So when the screen space available to a list changes, the application can automatically adjust the list’s appearance to still convey information effectively.
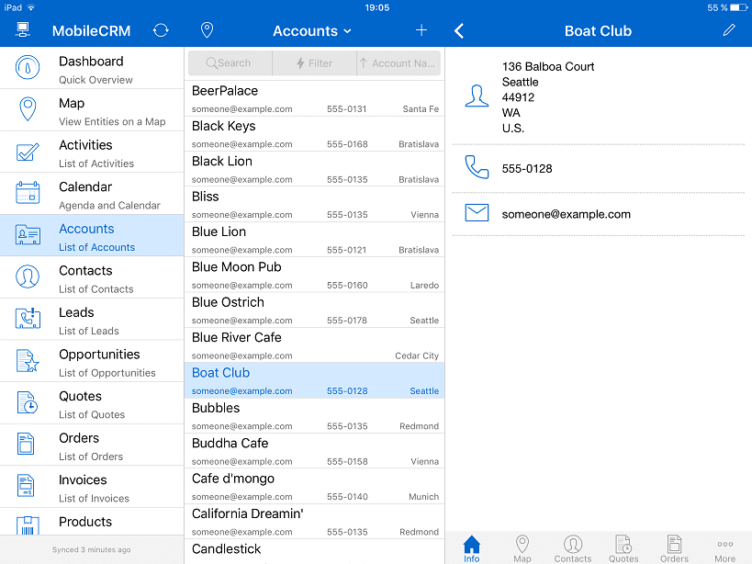
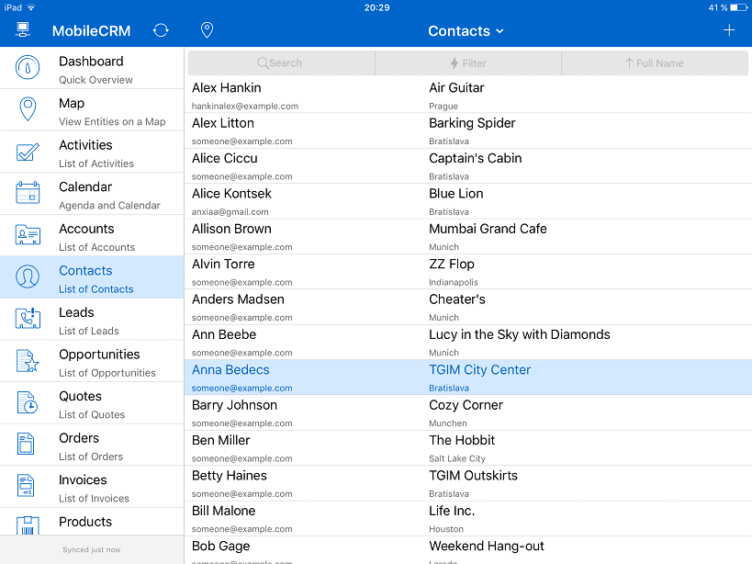
For example, when a list view is expanded across a tablet’s screen, each list item is displayed in a single row design:

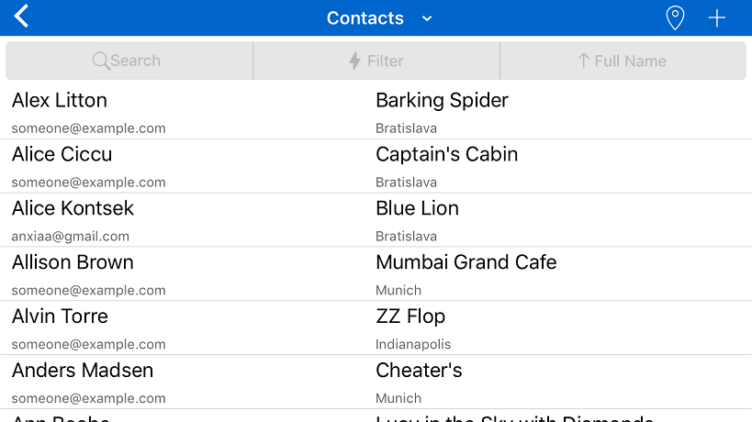
Once you open a particular record, the appearance of the list items automatically changes to a two-row design – enabling you to see the essentials (e.g. account’s street address, ZIP code and city) even in a much narrower space:
Create flexible view designs in App Configurator
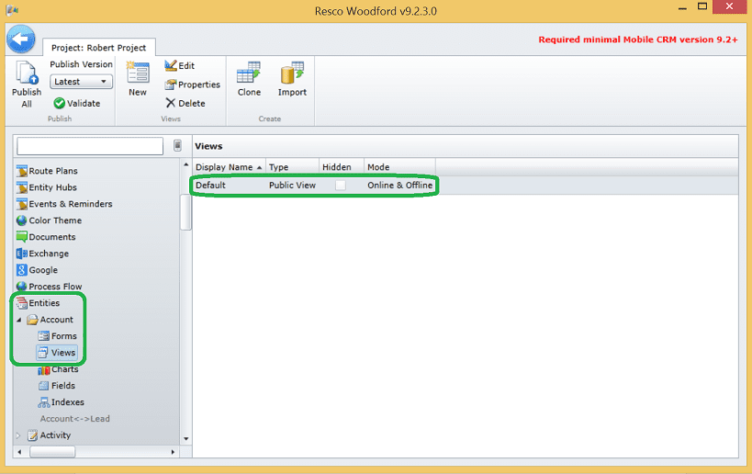
1. Log in to the App Configurator configurator with your CRM credentials and open your mobile project. In this example, we will show you how to set up a flexible list view of accounts, therefore, we will select the Account entity from the panel on the left. There, click on the Views tab and open the Default view from the list of available views.
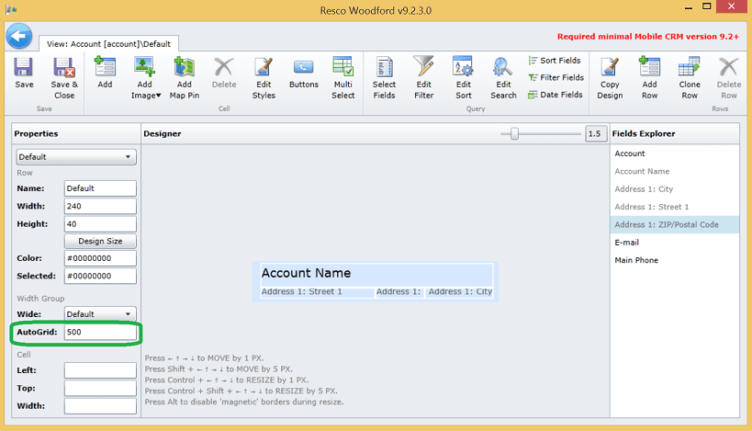
2. When a list is wider than the size provided in the AutoGrid field (500 pixels by default) a predefined single row design will be generated automatically. You can adjust this value to fit your requirements in the view’s Properties section on the left.
Note: If you don’t want to use a flexible list view, just type 0 into the AutoGrid field.
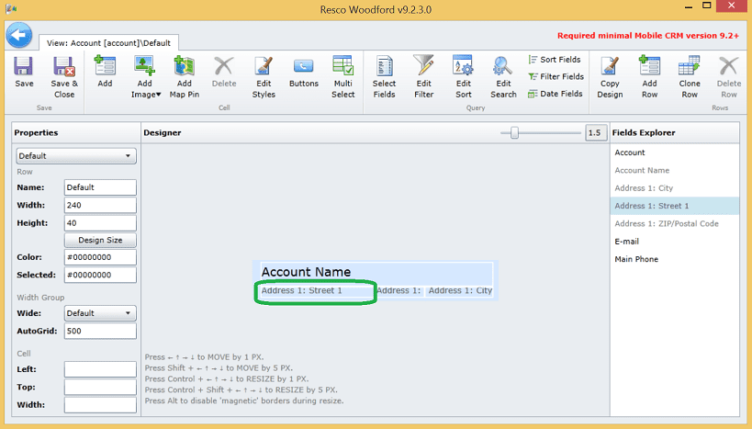
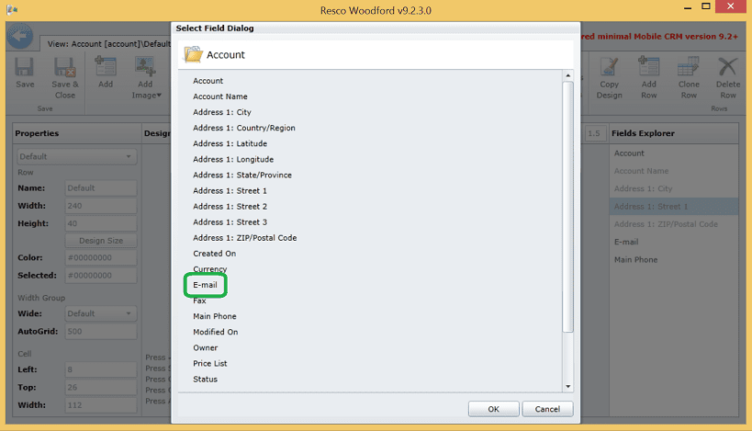
3. Apart from the account names the list also shows their street address, ZIP code and city. We want to change it to display the email address and phone number instead of street and ZIP. To do so, double-click on the field’s cell in the Designer and then you can pick the field you want to use instead from the Select Field Dialog.
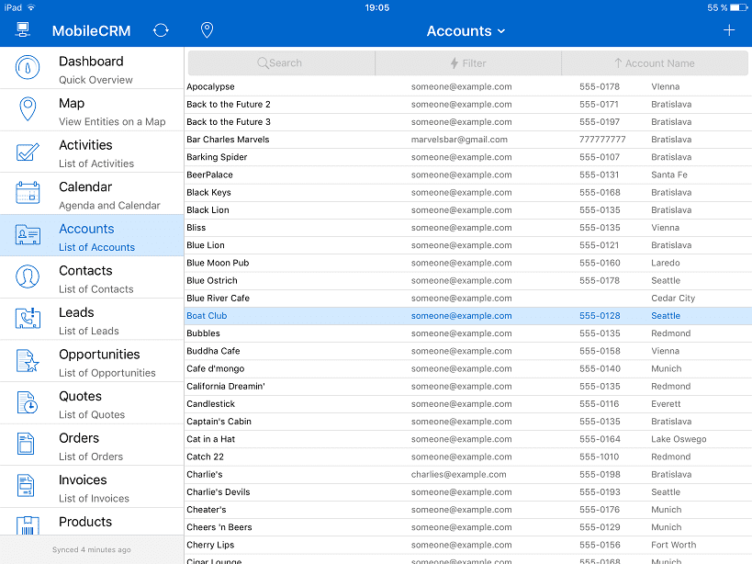
4. Don’t for get to hit Save and Publish All to see the changes after you sync the app. The Account list view should then look like this:
And when you open a record it will automatically transform so you can see all the information even in a narrower area:
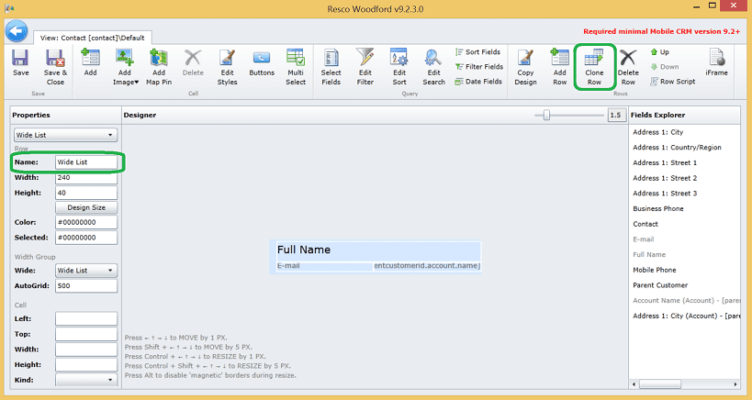
5. You can also create an entirely customized design for your list items. Let’s say that at the Contact list view we want to see the contact names and emails, plus their parent accounts and home cities. And when there’s not so much space available, we still want it to show the contact’s name, e-mail and parent account. All neatly arranged in two rows.
We’ll start by copying the default list item design by clicking the Clone Row button and renaming the copy in the Properties section.
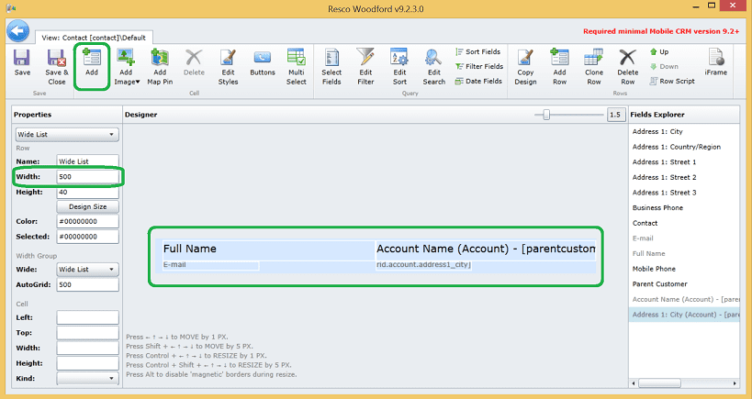
6. Change the Width of the design in the Properties section. Then click the Add button to add an extra cell and arrange the cells in the Designer. Double-click on each cell and pick from the Select Field Dialog, which fields will be displayed – just like in the previous example. In the lower part of the Properties section part you can also define the characteristics of each cell, including what the kind of information it will contain (texts, images, pins, etc.).
7. Save and Publish All and when then you run and sync the app the Contact list view will look like this:
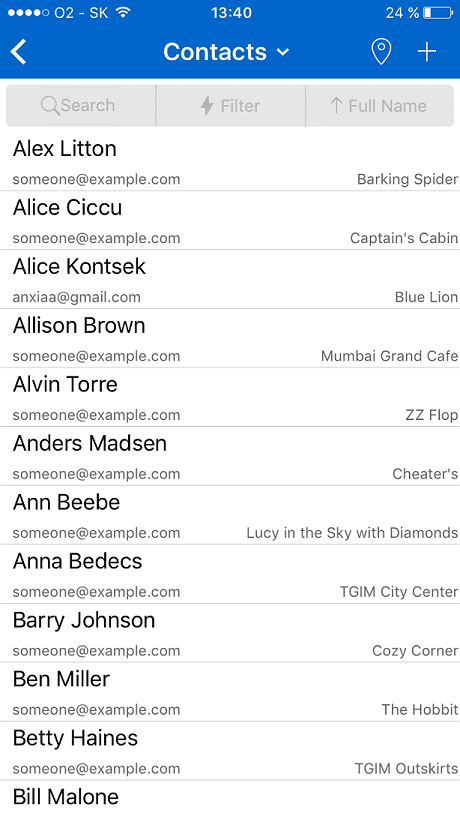
After opening the details of a contact you will see the list form transform again – the parent account name moves to the second row, next to the contacts e-mail address:

This is also practical on your phone – when you hold it in landscape you’ll see the wider design, but after you turn it to portrait mode the list design for narrower space will be automatically applied by the app:
To get more useful tips and tricks on the latest Resco Mobile CRM features, follow this blog or sign up for our Resco Academy.


